If you decide to program your own code for 8051 Microcontroller, then First download the Keil uvision software from their official website by using the Link below,
Keil uvision Software Download here.
If you use Keil uvision in first time then you can avoid to face many trouble with the use of Keil uvision software by following steps.
14-Step to Use of Keil uvision Software for Programming :
Step-1
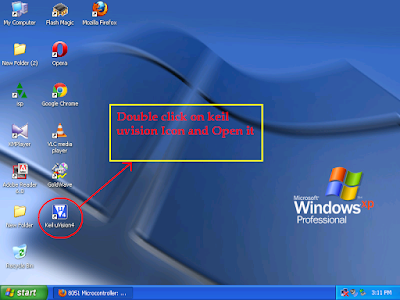
After successful installing Keil uvision software, just double click the icon on your desktop as shown in figure to open it.
 |
| Step-1 |
Step-2
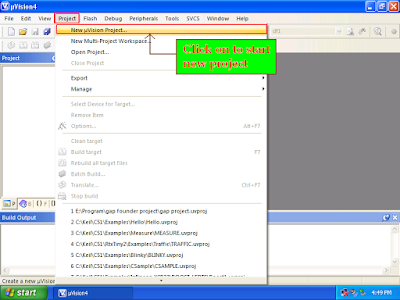
Now, create the new Project by clicking the Projects tab in Menu bar.
 |
| Step-2 |
Step-3
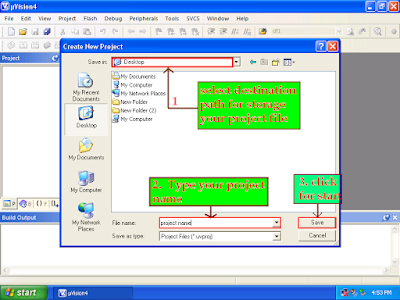
Select the path, where you wish to store the Project file and give your Project Name.
 |
| Step-3 |
Step-4
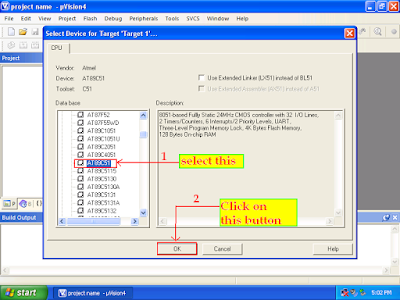
After complete the Step-3, a screen will appear as shown below. In this select the Controller which is used for this Project.
 |
| Step-4 |
Step-5
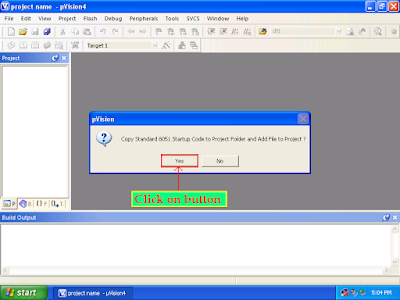
If you write your Program in C language then click yes in following dialog box. it is a start up file which initialize the controller. If you Write your Program in Assembly Language then click No tab, because it is not required for assembly language.
 |
| Step-5 |
Step-6
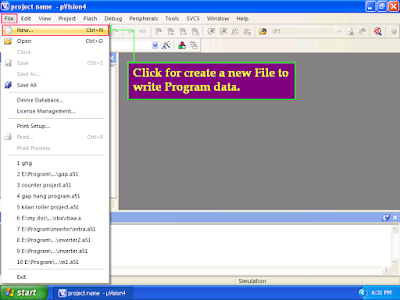
Now, you need to create a new file to write your program.
 |
| Step-6 |
Step-7
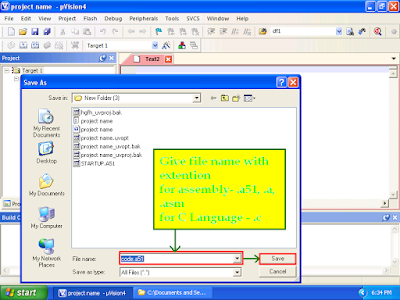
Give your program file name with following extension.
For Assembly Language - .a51 , .a , .asm
example : Program.a51 / Program.a / Program.asm
And for C Language - .c
example : Program.c
 |
| Step-7 |
Step-8
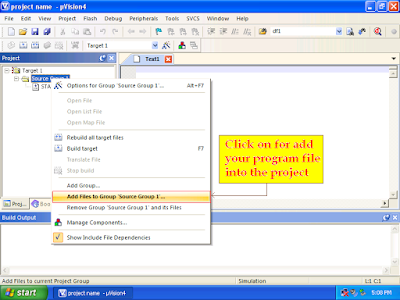
Now, you require to add your Program file to your Project.
 |
| Step-8 |
Step-9
Select your Program file and click add Button.
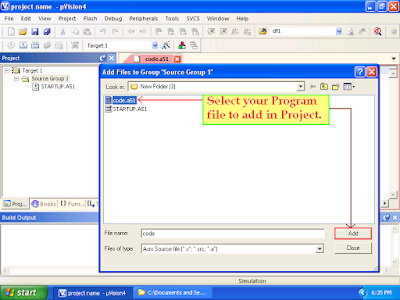 |
| Step-9 |
Step-10
The added Program file is Shown in your Projects List as shown bellowing figure. Now, you can start to write your program in right hand side window.
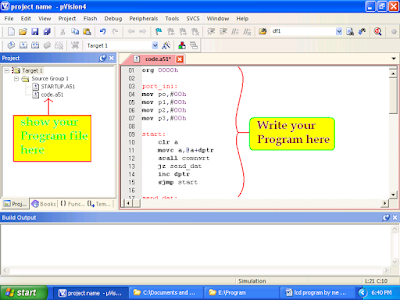 |
| Step-10 |
Step-11
After writing Program, you need to create build target for detecting the errors related to your program like as syntax errors, warnings, etc.
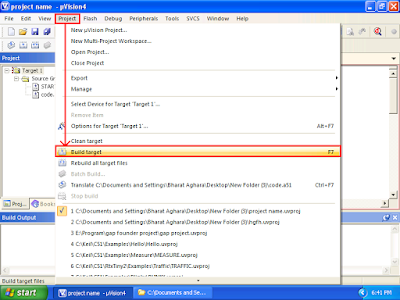 |
| Step-11 |
Step-12
The Errors and Warnings related to your Program is shown in bottom window.
For next step, you solve it first if any errors and warnings generate and rebuild target until it should be Zero.
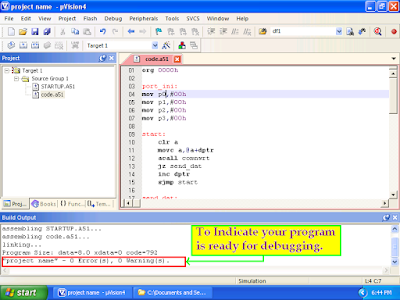 |
| Step-12 |
Step-13
After Complete the Step-12 , you are able to debugging your program for simulate and analysis
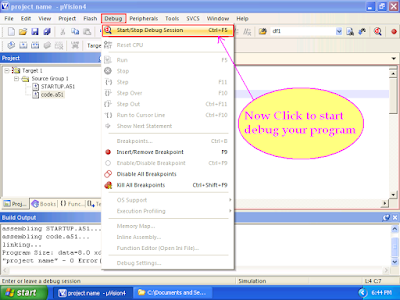 |
| Step-13 |
Step-14
Now, you can run the Program for simulate and you analyze your program. you also watch the logic Analyzer for showing the status of pin logic as per your program and much more as you done.
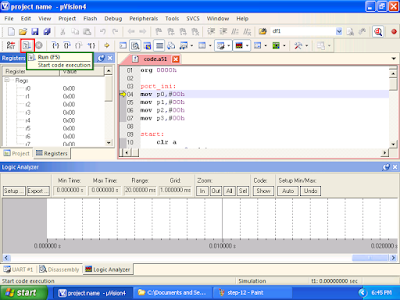 |
| Step-14 |


Hi dear your blog is very interesting and full technical knowledge. here is an other pic microcontroller blog , see and comment on it Microcontroller Solution and Projects here is its link. https://microcontroller-atmel-pic-avr.blogspot.com/. for further reading please visit above link/ blog
ReplyDelete